Cleanup & Drying
How to Clean and Disinfect After a Flood
Step-by-step guide to cleaning and disinfecting your home after a flood — surfaces, materials, and the right disinfectants per CDC and EPA.
Reviewed against current CDC, EPA, FEMA and IICRC S500 guidance.
Knowing how to clean after a flood is not instinct — floodwater is a mix of sewage, chemicals, soil bacteria, and anything else the water moved through before it reached your floors. Wiping it down with a mop and calling it done leaves pathogens behind and sets the stage for a mold problem that costs far more to fix than the cleaning would have. This guide walks through every surface and material type so you know exactly what to scrub, what to soak, and what to throw out.
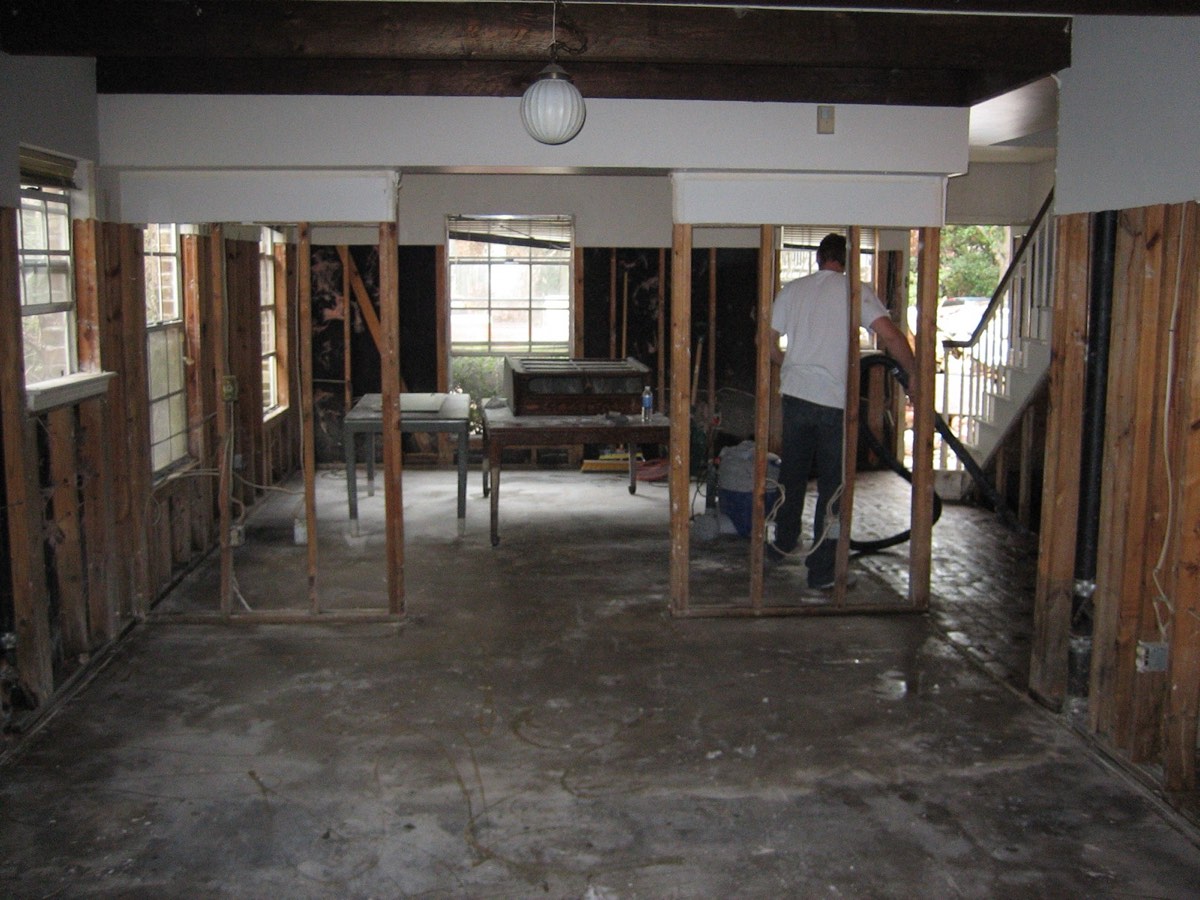
Photo: Infrogmation of New Orleans, CC BY 2.5 — worker cleaning a flood-damaged home after Hurricane Katrina.
Before You Start Cleaning: Three Things That Must Come First
Confirm It Is Safe to Re-enter
Do not go back inside until emergency management has given the all-clear for your neighborhood, and your own visual inspection confirms the structure is not visibly sagging, leaning, or cracked. Electrical safety after a flood is the first hazard — water and energized wiring can kill. If you have any doubt about whether power has been safely shut off, call your utility company and wait.
Read our full guide on when it is safe to stay in your home after a flood before you decide whether to work inside.
Verify Standing Water Is Removed
Cleaning on top of standing water accomplishes nothing. All surface water must be removed before scrubbing and disinfecting begins. If you have water remaining on the floor, work through our standing water removal guide first, using a wet/dry vacuum, submersible pump, or squeegee depending on depth.
Gear Up Completely
Floodwater is contaminated. The health risks from floodwater include E. coli, Salmonella, Hepatitis A, Leptospira, and a wide range of chemical contaminants. Before touching anything, put on:
- N95 or N100 respirator — not a fabric or surgical mask
- Waterproof rubber or nitrile gloves extending past the wrist
- Rubber boots that reach above any residual wet areas
- Eye protection — splash-rated goggles or safety glasses
- Coveralls or clothing you can bag immediately after to avoid tracking contamination
Why Speed Matters: The 24-to-48-Hour Mold Window
The EPA and FEMA both cite 24 to 48 hours as the window during which mold can begin colonizing wet building materials. That is not a soft guideline — mold spores are already present in every home at background levels. They are waiting for the moisture that flood damage delivers. Once mold is established in wall cavities and subfloor, a cleaning job becomes a full mold remediation job, which is a different scope of work at a very different cost.
Start cleaning as soon as it is safe. Every hour counts.
Source: EPAWhat Flood Cleanup Supplies Do You Need?
Gather everything before you start. Stopping mid-job to run to the hardware store wastes time and leaves wet surfaces sitting longer.
Cleaning:
- Stiff-bristled scrub brushes and a push broom
- Mop and bucket (dedicated to cleanup — not your kitchen mop)
- Unscented liquid chlorine bleach (do not use splashless or scented — they contain additives that reduce disinfection effectiveness)
- Heavy-duty trash bags, minimum 3-mil
Disinfection:
- EPA-registered disinfectant or diluted bleach solution
- Spray bottle for applying solution to walls and hard surfaces
- Clean rinse water in separate buckets
Drying:
- Box fans and oscillating fans — as many as you have or can borrow
- Dehumidifier (or a rental unit from a hardware store)
- Open windows and doors when outdoor humidity is lower than indoor humidity
Personal protection (restated — critical):
- N95/N100 respirator
- Rubber gloves, rubber boots, eye protection
The Diluted Bleach Formula (CDC Guidance)
The CDC recommends two ratios depending on container size:
| Container | Unscented bleach | Water |
|---|---|---|
| 1 gallon | 1 cup (approximately 240 mL) | Fill to 1 gallon |
| 1 quart | 4 teaspoons | Fill to 1 quart |
This produces roughly a 1,000 ppm sodium hypochlorite solution — effective against the bacteria and many viruses commonly found in floodwater. Mix fresh solution daily; bleach degrades quickly. Never mix with ammonia-based cleaners (ammonia + bleach produces toxic chloramine gas).
Apply to surfaces after scrubbing away visible mud and debris. Disinfectant does not penetrate filth — it works on surfaces that are already visibly clean.
Source: CDCSurface-by-Surface Cleaning Guide
Hard Non-Porous Surfaces: Concrete, Tile, Vinyl
Concrete basement floors, ceramic tile, and vinyl plank are your most forgiving surfaces. They do not absorb water the way wood and drywall do, which means they can be fully disinfected if treated promptly.
Process:
- Sweep or shovel out all mud, silt, and debris.
- Scrub with a stiff brush and hot, soapy water. Rinse.
- Apply the diluted bleach solution with a mop or spray bottle.
- Let it dwell for at least 10 minutes.
- Rinse with clean water.
- Open windows and run fans immediately to begin drying. Do not let the surface stay wet.
Pay attention to grout lines and floor drains — these trap organic material that feeds mold.
Walls and Drywall
This is where most homeowners make costly mistakes. Wet drywall acts like a sponge. Even if the outside face looks dry a few days later, the paper facing and gypsum core may still be holding moisture — and mold will grow inside the wall before you see any sign of it on the surface.
Decision point first: If floodwater touched the wall above the baseboard, measure how high it reached and read our guide on whether to remove or dry wet drywall. The general rule from the IICRC S500 standard: drywall saturated by Category 2 or Category 3 water, or any drywall that shows visible mold or has been wet for more than 24 to 48 hours without active drying, should be removed rather than cleaned in place.
If the drywall is intact and was only briefly wet (Category 1 water):
- Wipe off visible mud with a damp sponge.
- Wash with soap and warm water using a soft brush or sponge.
- Apply diluted bleach solution with a spray bottle.
- Let dwell 10 minutes, then blot (do not scrub — scrubbing can break the paper face).
- Run dehumidifiers and fans pointed at walls.
Mark the waterline with a pencil before you clean — it helps document the loss for insurance and tells contractors where framing may need inspection.
Wood Surfaces: Floors, Framing, Subfloor
Solid hardwood floors and structural wood framing need different handling. Hardwood floors may warp and cup even after cleaning, especially if water sat for more than a day. Subfloor plywood or OSB that stays wet will delaminate and develop mold underneath — which you will not see until you are already dealing with a serious problem.
For wood framing and subfloor:
- Remove all insulation that got wet — it cannot be dried effectively and traps moisture against framing.
- Scrub exposed framing with soap and water.
- Apply diluted bleach or an EPA-registered mold-inhibiting solution.
- Allow to dry completely (moisture content below 16%) before enclosing walls. Use a moisture meter if you have one.
For hardwood floors, the cleanup process and salvage odds depend heavily on how long they were wet and what kind of water. Read our detailed guide on drying water under hardwood floors for the surface-specific approach.
HVAC Systems and Ductwork
Your HVAC system can spread contamination and mold spores throughout the entire house if you run it while the system or ducts are still damp. Do not run your HVAC until a professional has inspected it.
If your air handler or ductwork flooded, expect those components to need professional cleaning or replacement. Flexible duct that got wet is almost never salvageable — replace it.
Appliances and Kitchen Surfaces
Refrigerators, dishwashers, and kitchen appliances that were submerged present two problems: electrical safety (do not plug in anything that got wet until a licensed electrician clears it) and sanitation.
Removable parts — shelves, drawers, racks — can be washed with soap and water, then sanitized with diluted bleach solution. Cabinet interiors are wood or wood-based composite, which absorbs water. If the cabinet boxes are soaked through, they often need to be replaced rather than dried in place.
Food that was in contact with floodwater or in refrigerators that lost power for more than four hours should be discarded.
What to Discard vs. What to Clean
This is the decision that trips people up. Emotional attachment to belongings is real, but porous materials saturated with Category 2 or Category 3 floodwater present ongoing health risks if kept.
| Item | Category 1 (clean water) | Category 2 (gray water) | Category 3 (sewage/flood) |
|---|---|---|---|
| Carpet + padding | May save with rapid drying | Discard padding; assess carpet | Discard both |
| Upholstered furniture | Possible if dried fast | Discard if soaked | Discard |
| Mattresses | Discard if soaked | Discard | Discard |
| Books / papers | Possible (freeze first) | Discard | Discard |
| Hard-surface furniture | Clean + disinfect | Clean + disinfect | Clean + disinfect |
| Toys (soft/porous) | Assess individually | Discard | Discard |
| Canned goods | Wipe exterior; inspect lid | Discard if swollen/dented | Discard |
| Clothing + linens | Wash at high temp | Wash at high temp | Wash at high temp or discard |
Review our broader guide on what to salvage after a flood for a full decision framework organized by material type.
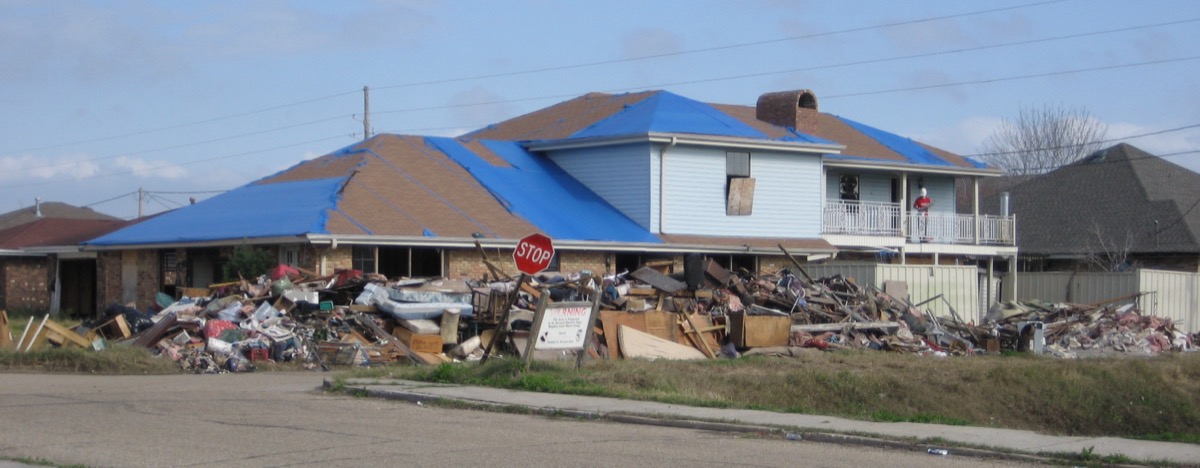
Photo: Infrogmation of New Orleans, CC BY 2.5 — removing flood-damaged possessions and interior materials, Chalmette, Louisiana.
Cleaning Step-by-Step Timeline
The order of operations matters. Disinfecting before cleaning achieves nothing — disinfectants cannot penetrate mud and debris. Drying before disinfecting lets bacteria multiply on the cleaned surface. Here is the correct sequence:
Step 1 — Safety check: Utilities confirmed off, structure confirmed safe, gear on.
Step 2 — Remove debris: Shovel, bag, and haul out mud, silt, and contaminated porous items before any scrubbing begins.
Step 3 — Soap scrub: Wash every surface with hot water and dish soap or all-purpose cleaner. This is the mechanical cleaning step that removes organic material. Rinse with clean water.
Step 4 — Disinfect: Apply diluted bleach solution to all hard surfaces. Let it dwell at least 10 minutes. Do not wipe prematurely.
Step 5 — Rinse: Remove bleach residue with clean water, particularly on surfaces that will contact food or children.
Step 6 — Dry aggressively: Open windows, aim fans at wet surfaces, run dehumidifiers continuously. Target indoor relative humidity below 50%. Track progress — surfaces should feel completely dry within 24 to 48 hours of active drying. Wet materials that are not drying fast enough need to come out.
How to Dry Properly After Cleaning — Because Disinfectant on Wet Surfaces Doesn’t Work as Well
One thing the label on your bleach bottle will not tell you: disinfection effectiveness drops when the surface is not clean and when contact time is short. Standing moisture also dilutes the solution and reduces dwell time. This means the drying step after disinfection is not just about preventing mold — it ensures the disinfection actually worked.
Run fans and dehumidifiers continuously for 24 to 72 hours after cleaning. Track how long materials are taking to dry with our water damage drying timeline guide. If a surface is not dry within the expected window, it likely needs mechanical removal rather than more drying time.
Mold Prevention After Cleaning
Cleaning and disinfecting reduces the microbial load on surfaces, but it does not guarantee mold will not develop in the weeks that follow. Mold spores are always present — they need moisture to activate. Your defense is sustained dryness.
- Keep indoor relative humidity below 50% for at least two weeks after the flood
- Monitor walls, baseboards, and ceilings for new discoloration
- Do not re-carpet or close walls until a moisture meter confirms framing is dry
- Consider a HEPA air purifier in rooms that were heavily affected
Our full guide on how to prevent mold after water damage covers long-term monitoring and what to do if you start seeing early signs.
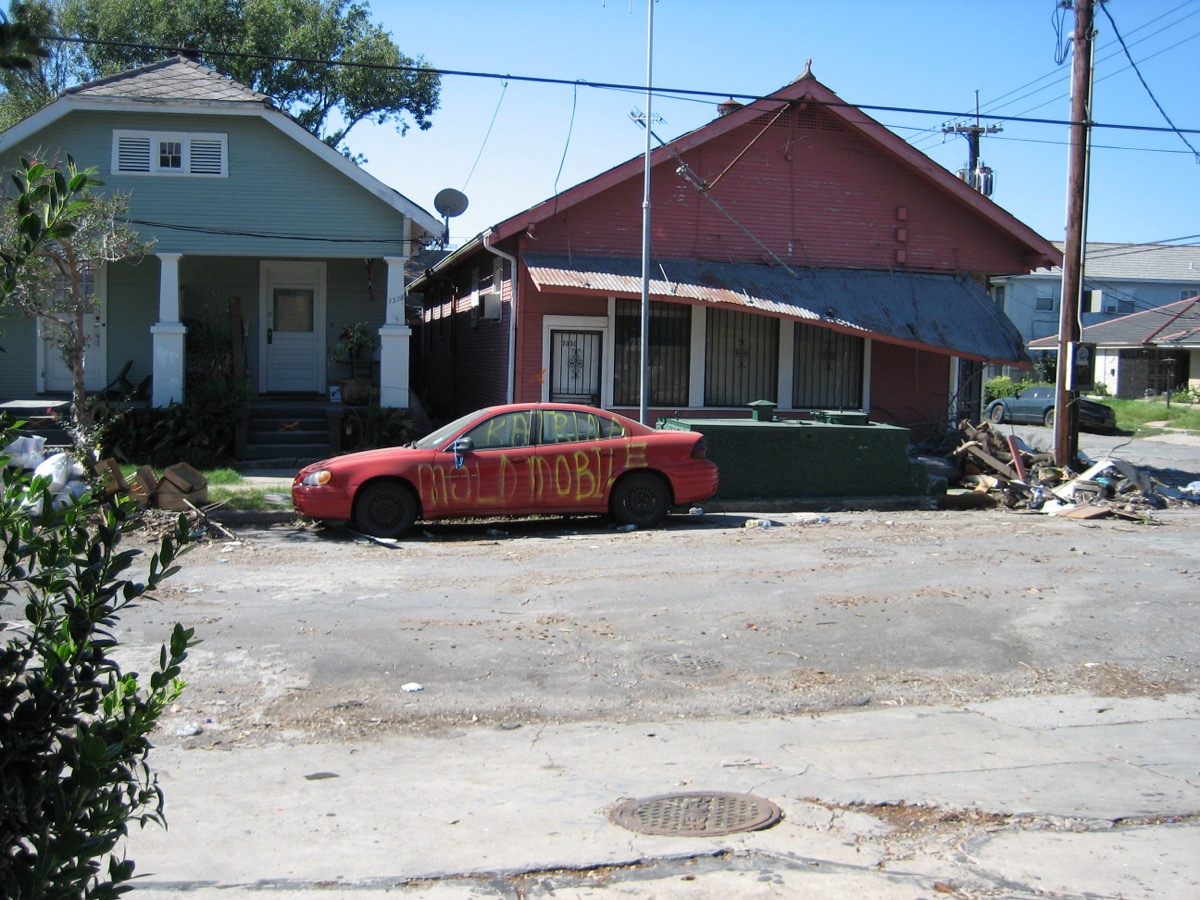
Photo: Infrogmation of New Orleans, CC BY 2.5 — mold growth on a Katrina-flooded vehicle, New Orleans.
Source: IICRCWhen to Call a Professional Instead of DIY
You can do much of this work yourself — but there are situations where professional crews are the right call, not just a convenience.
Call a water damage professional if:
- The flood involved sewage backup or storm surge (Category 3 water). The pathogen load is serious and the EPA recommends professional remediation for Category 3 events.
- Water affected more than one room or penetrated structural cavities (wall framing, floor joists, crawl space).
- Standing water sat for more than 48 hours before removal.
- You can already see or smell mold.
- You are filing an insurance claim — professional documentation and IICRC-certified drying logs strengthen claims significantly. Read our guide on filing a flood insurance claim before the adjuster arrives.
Our DIY vs. professional flood cleanup comparison lays out the cost, risk, and coverage implications side by side so you can make the call with full information.
Source: EPADocumenting Everything While You Clean
Photograph every surface before and after cleaning. Your insurer needs documentation of the damage, and photographs taken after clean-up but before repairs are often the most useful evidence. Keep a written log of what you discarded, when, and why. For a complete documentation checklist, read our guide on how to document flood damage for insurance.
Frequently Asked Questions
What is the correct bleach solution for disinfecting after a flood?
The CDC recommends 1 cup of unscented liquid chlorine bleach per gallon of water — about 4 teaspoons per quart. Apply after cleaning visible debris, let it dwell at least 10 minutes, then rinse. Mix fresh daily; bleach degrades. Never mix with ammonia.
How soon after a flood should you start cleaning?
Within 24 to 48 hours of the water receding. Mold begins colonizing wet materials inside that window. Every hour matters — starting faster means less material to replace and a lower total remediation cost.
Can you save carpet after a flood?
Only if it was soaked by Category 1 (clean) water and drying began within 24 hours. Category 2 or 3 floodwater-soaked carpet should be removed. Padding beneath it is almost never salvageable regardless of water category.
Do you need to disinfect walls after a flood?
Yes. Floodwater deposits bacteria and pathogens on every surface it touches, including walls. Clean with soap and water first, then apply diluted bleach solution. If drywall absorbed water, assess whether it needs removal — wet drywall that shows no mold may still harbor it inside the wall cavity.
What protective gear do you need for flood cleanup?
N95 or N100 respirator, waterproof rubber or nitrile gloves, rubber boots, and eye protection at minimum. For Category 3 water, add full-body coveralls. Never touch floodwater or contaminated surfaces bare-handed.
When should you call a professional for flood cleanup?
If sewage was involved, if more than one room was affected, if water sat for more than 48 hours, or if you already see or smell mold. Also call professionals if you are planning to file an insurance claim — their documentation carries more weight with adjusters.